Gloster Meteor, First Prototype DG202/G - second stage - (Tamiya 1/48)
The kit is Tamiya's 1/48, first edition (with a mistake). According to the reference book below, Meteor has no air brakes on the main wing till F. Mk-2. Since I am going to build prototype DG202/G, I corrected this mistake first (Tamiya issued revised edition a half year later,,,, I purchased this first rare edition on discount sale at specialized shop in Akihabara district of Japan). I started this modeling in March 2012, exclusively in the weekend at Hayama's retreat.
I must give credit to this great [Reference] Caruana, Richard J.; The Gloster Meteor and AW Meteor: A Comprehensive Guide for the Modeller. SAM Publications, 2004.
(To view the images, click the underlined phrases, and to return to this page,
click RETURN key on the toolbar of your browser
All pictures here are shot by me, a seasoned-pathologist, with digital SLR Nikon D3000 Serial #2001042 with old Nikkor-S 35mm 1:2.8 Serial #380104, i.e., manual focus/manual exposure)

(Crick for English description)
This site is licensed under a Creative Commons License.
(Crick for Japanese description)
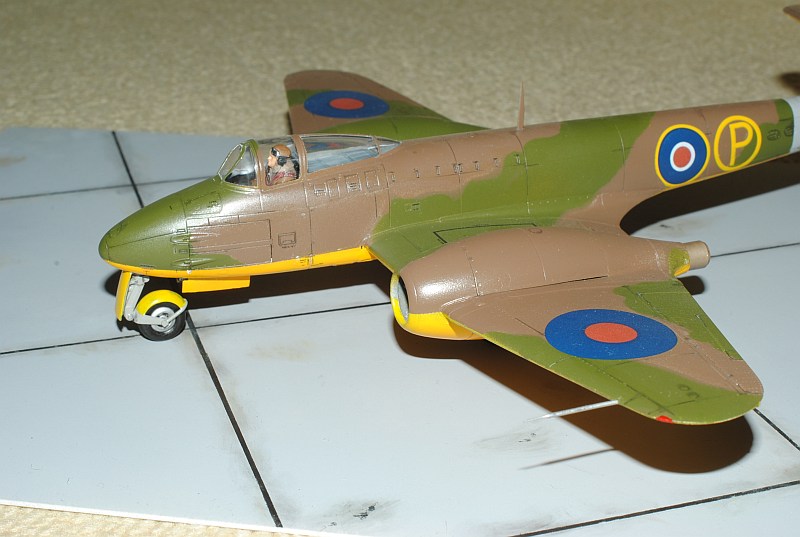
Completed Images
Left front upper view
Upper anterior view

Posterior view

Upper view with engine cover detached
Chronology
2012.3.4: I started with correction of non-existent airbrakes on the main wing. After glued air brakes on the wing, I coated the surface with patty, and polished #400 to #1000 water-proof sandpaper.
2012.3.10: Main and tail horizontal wings are glued, with special attention to fixing angle (I used masking tape to fix the angle). Undercarriage bay is painted in flat silver with additional weathering. As I am going to build the 2nd stage of the first prototype DG202/G , I added cannons (20mm x 4) using diameter 0.7mm piano wire and liquid instant glue (Inside).
2012.3.17: The cockpit and pilot was painted - Photo-1, Photo-2 (seat belts by Eduard) - and installed to the fuselage.
2012.3.24: After canopy is masked with tapes with special caution and bump is filled with patty and rubbed with #1500 sandpaper, upper surface is sprayed with Tamiya's surface primer (gray). Groove of the filler cap of fuel tank is recut with special tool (scratch gauge) with the aid of metal template. After masking of the undercarriage bays and camouflage parting line of the fuselage with tapes, undersurface is sprayed with Tamiya's fine surface primer (this time white, because of fanal undersurface color is yellow which tends to uneven coating) and panel line accent color was rendered.
2012.4.14: Upper and under surface was painted. Prototype DG202/G is distinct in its yellow under surface! Firstly underside was sprayed on the white primer with Mr.Color No. 58 (Orange yellow), since I do not well paint pure yellow. I additionally painted with brush very thin mixture of Tamiya XF-3 (flat yellow) and X-8 (lemon yellow), to lessen orange tone. Parting line was set using Blu-Tack (I owe this technique to Andy in Nara), and after brown part is covered with masking paper, dark green was sprayed. Now, dark earth (brown); Sprayed dark green part is masked in a similar fashion with Blu-Tack and paper, and dark earth (TAMIYA AS-22) was sprayed. Finished upper surface and under surface.
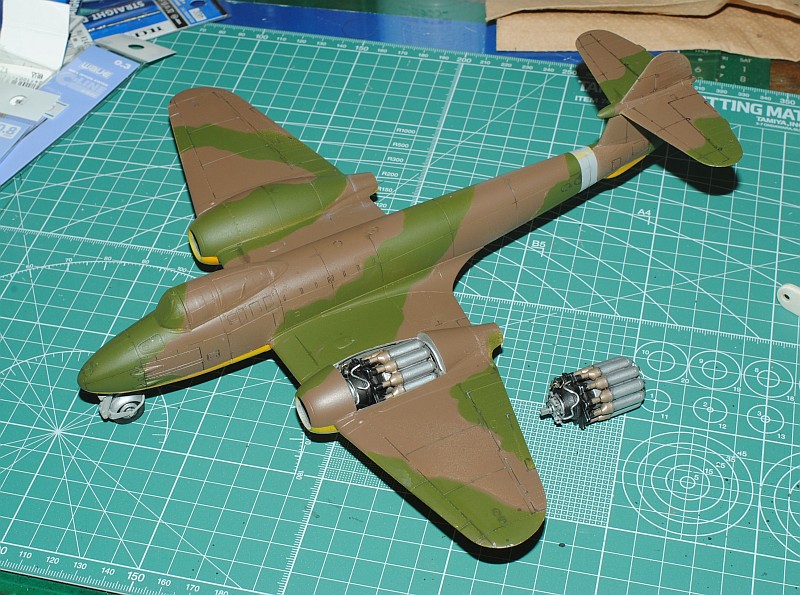
2012.4.21. Rolls-Royce Welland (W.2B/23) was assembled. This engine was originated from Frank Whittle's original design W.1, which was developed at his Power Jets Ltd. and flew in 1941 in the Gloster E.28/39 experimental aircraft, and was consisting of centrifugal compressor - the single-stage axial-flow turbine (impeller) (cf. current jet engine using multistage axial compressor) - and 10 reverse-flow flame cans (combustion chambers, placed around the compressor) (Diagram and real thing). The pioneers beared hardship during R and D of the first generation turbo jet. Salute! Firstly I painted with brush each part after masking with tape, and glued and parting-line accent paint was done (left engine tentatively mounted, enlarged view). I will probably add wiring later.
2012.4.29. Piping and wiring was added to Rolls-Royce Welland (W.2B/23). 0.4 mm nickel silver (german silver, 72% copper + 20% zinc + 8% nickel), 0.3 mm, 0.5 mm and 0.8 mm brass line (metal material) was glued with Tamiya's fast-acting gel-type cement. After boring holes using pin vice, cutting lines and pasting (bivouac), lines were painted with flat alminium XF-16 and panel accent paint (anterior view, refer to real thing: posterior view concentrated in fuel burner line!, refer to Diagram and real thing). Front and main undercarriages were pained and assembled, and engine and landing gears were temporaily mounted (Next image).
This weekend's achievement
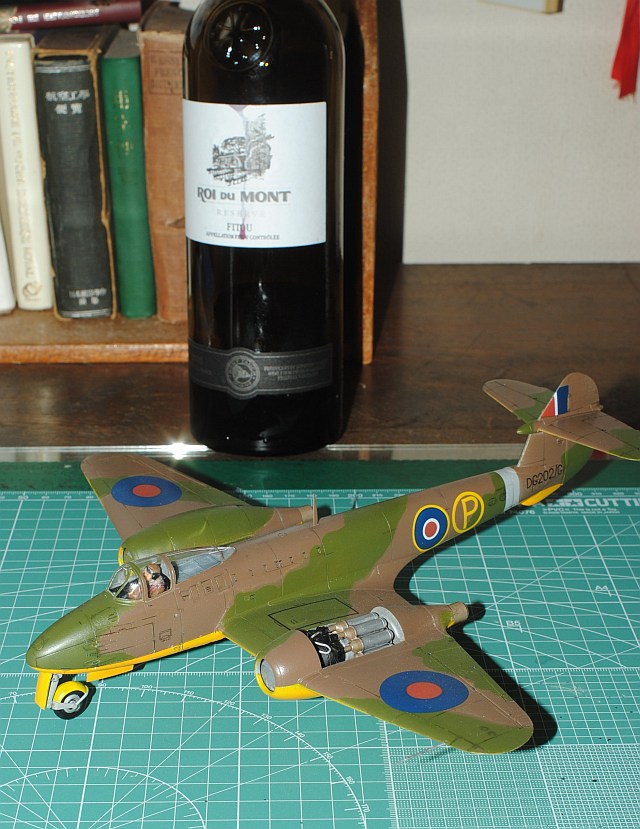
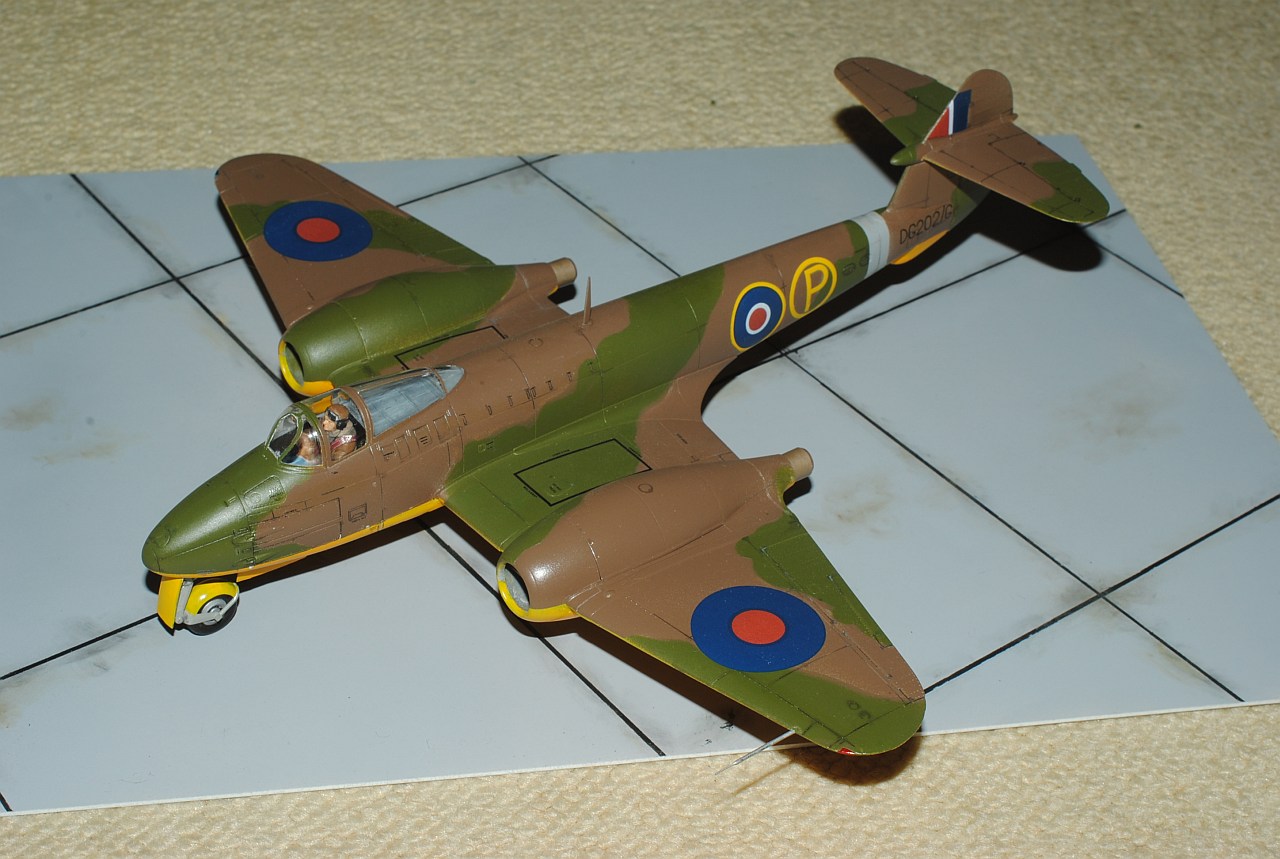
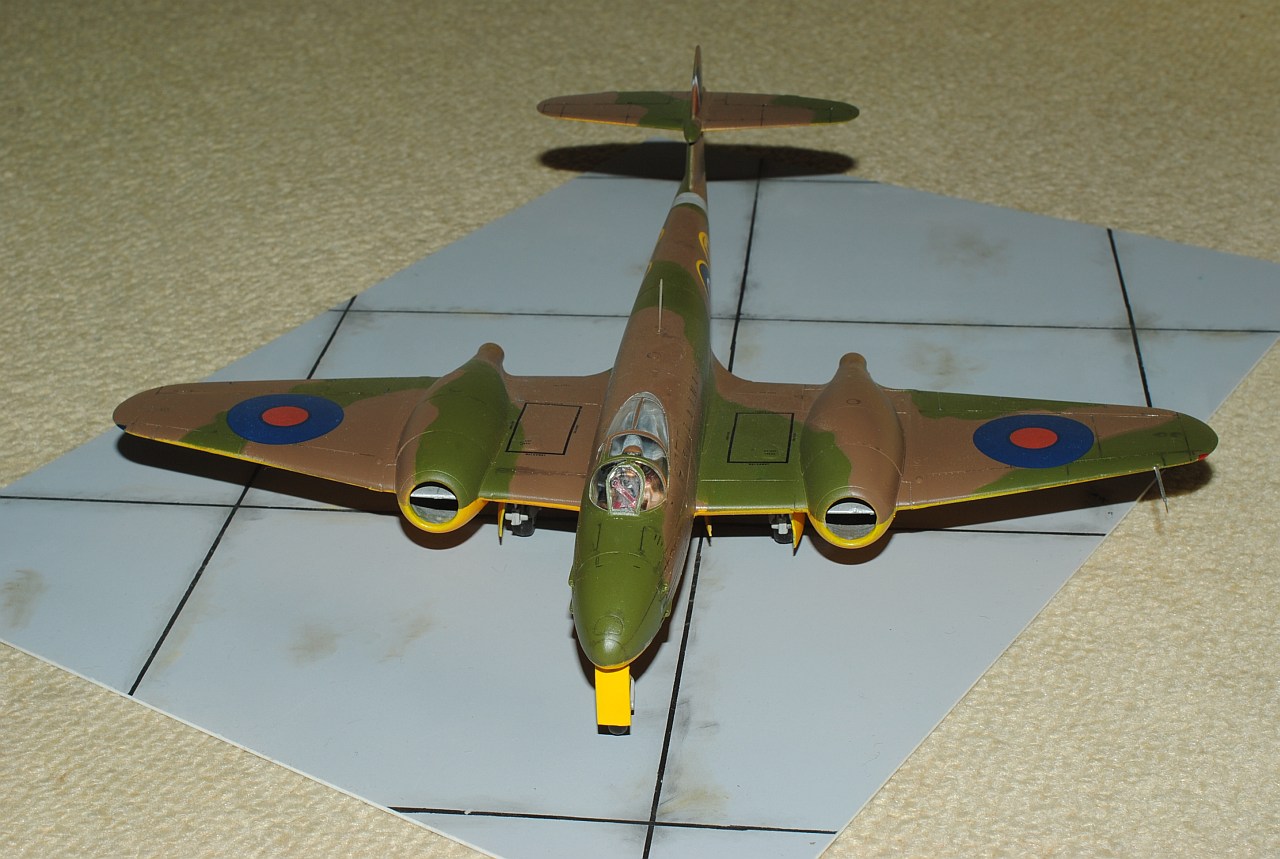
2012.5.3-6. Pitot tube was made scratch using injection needle and 0.3 cm brass line with patty for tapering in junction (red arrowheads). Undercarriages are glued. When decals were carefully applied using Mr. Mark Setter and Mark Fit (Tamiya), I was surprised to notice that this decals are made in USA!. Ummm, Be Proud of Made in USA, again. When the summit came into sight, I examine carefully the today's accomplishment, drinking a glass(es?) of red wine in the midnight.

This weekend's achievement
2012.5.12. Air strip for diorama was painted on thick plastic board. Firstly panel line was painted black after line was bordered with masking tape, then weathering was rendered using Tamiya's weathering master kit.
This weekend's achievement
Back to "Scale Model Hobby" Index Page
version 1.00 2024/8/1
Please send your comments to akio-h@fg-khn.jp
Back to previous Home Page at AOL (Till October 31 2008)
Back to previous Home Page at geocities.jp web host (Till March 31 2019)
Back to New Home Page (Translocated Sakura server)